
Push notifications are a powerful way to keep your audience engaged by sending real-time updates, offers, and important messages directly to their browser. They help drive traffic, boost conversions, and improve communication with your visitors.
To start using push notifications, you first need to add your website to the platform. This process ensures that notifications are delivered correctly to your users. Follow the steps below to set it up.
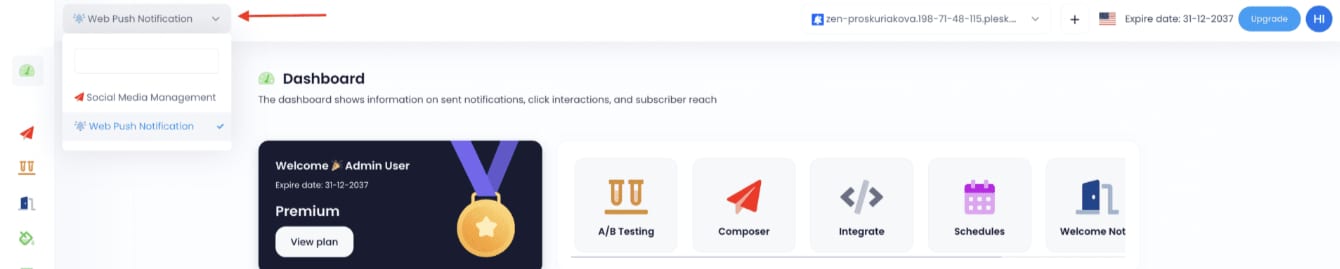
Turn the Web Push Notification mode on. Select it from the top menu to show the Push notifications tools.
Go to All Websites on the left sidebar. Click Add New.

Paste your website domain. Optionally, change the default icon for Web Push Notifications by clicking on Select, and choosing an image from the File Manager. When ready, click Submit.

Go to the Integrate tab and download the JSON file generated for your domain. Save it to your computer.

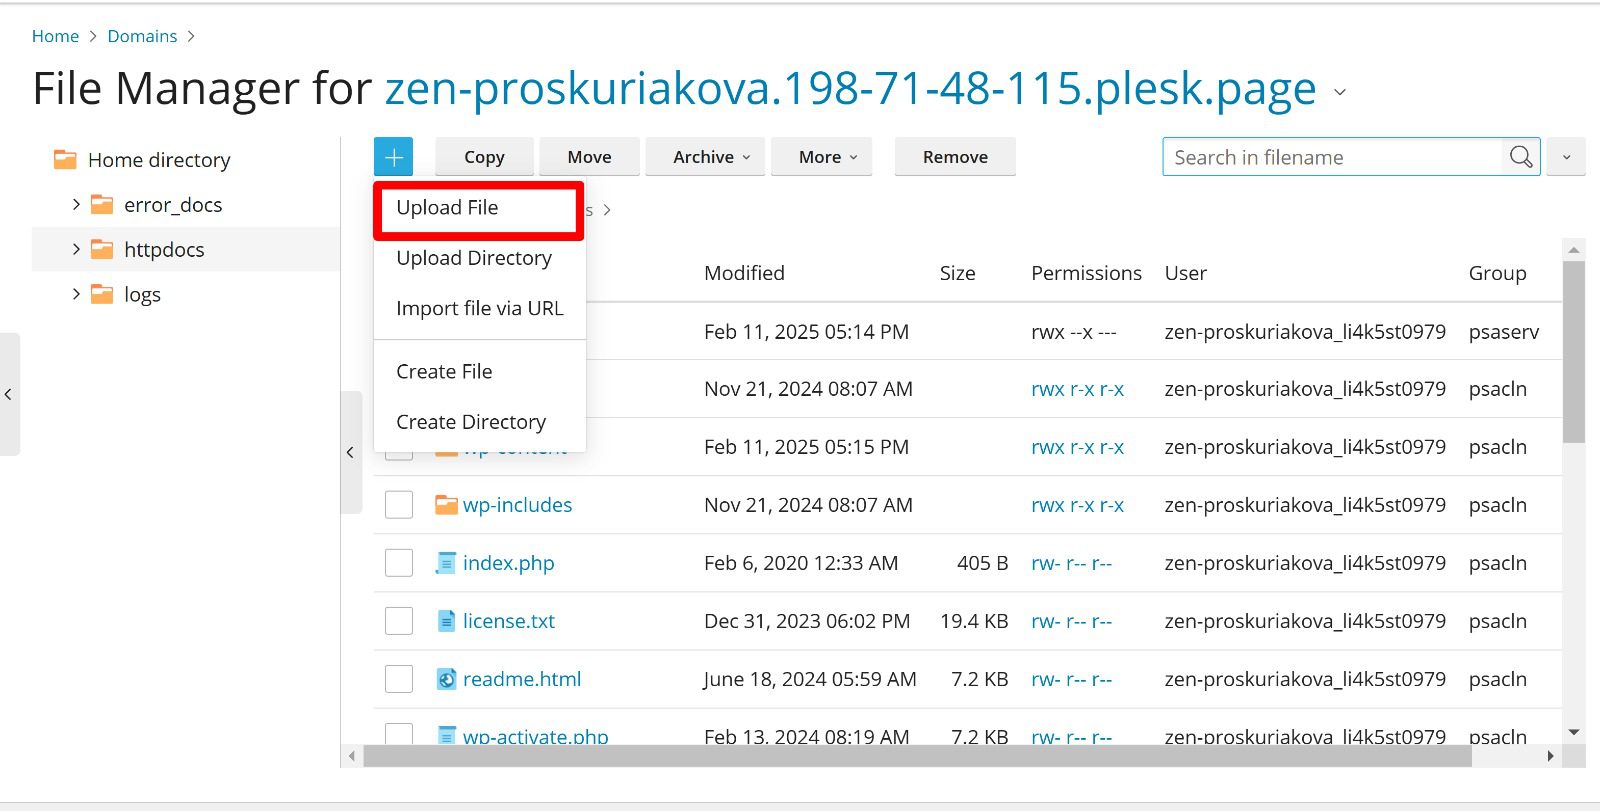
Install it into the root directory of your website. If you are using WordPress, you can upload it via an FTP client or file manager. If you are hosting on Plesk, cPanel, or other platforms, locate the public_html folder and place the file there.
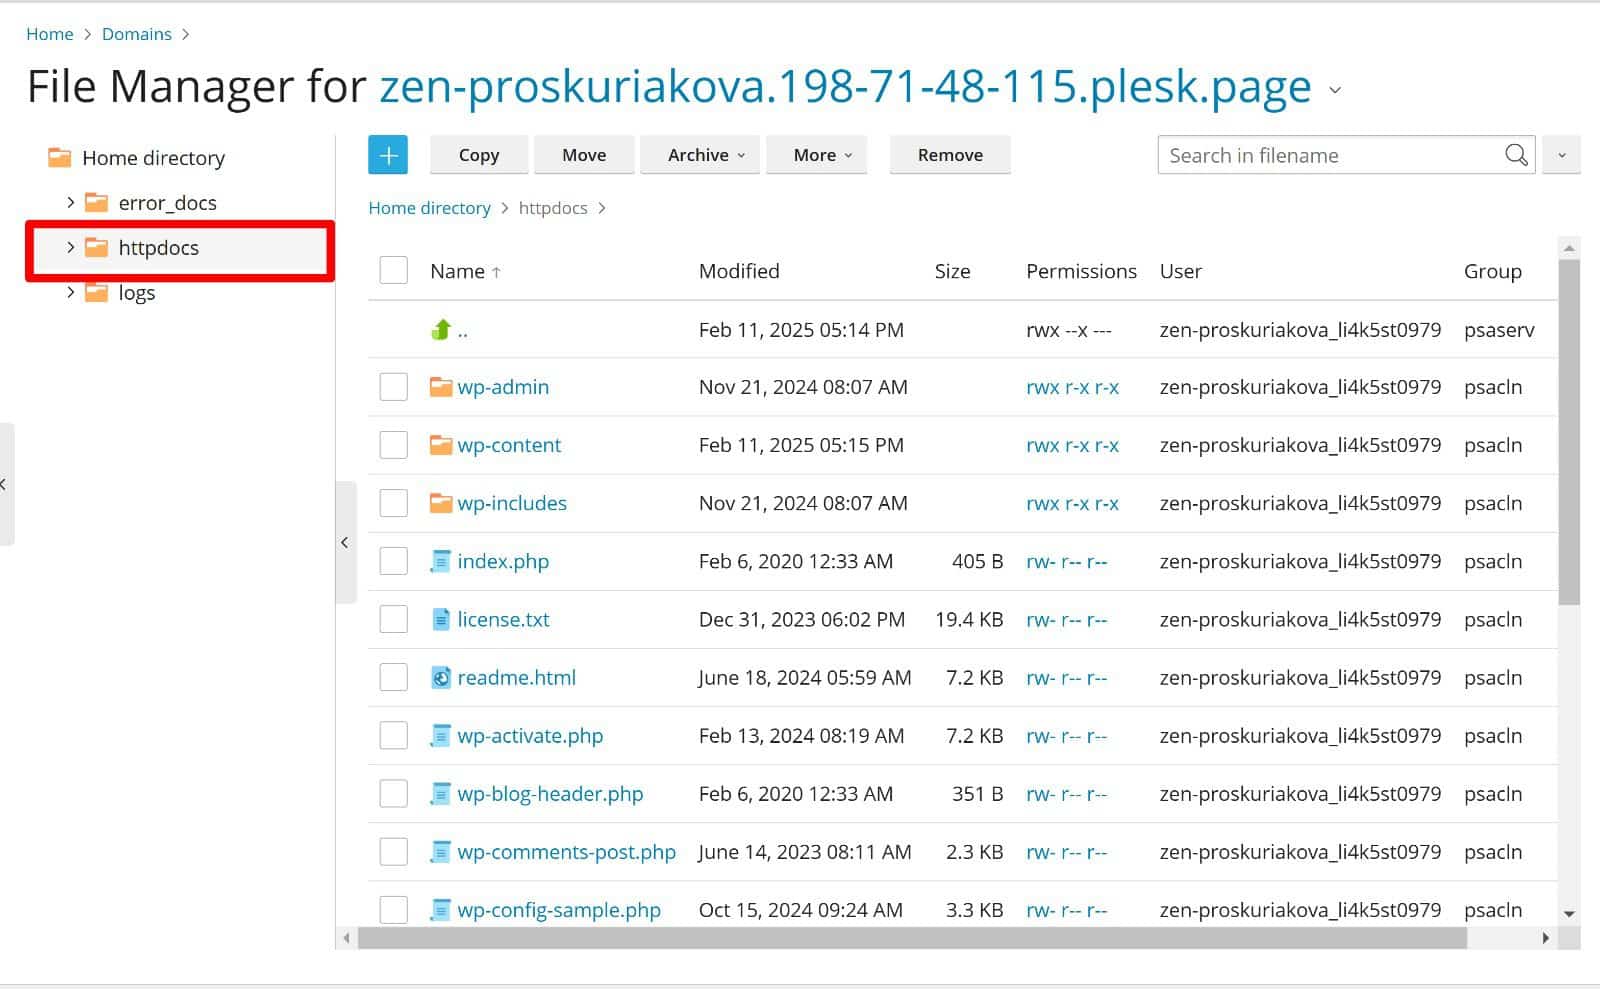
In the sample image, we are uploading the file to a WordPress page hosted on Plesk.
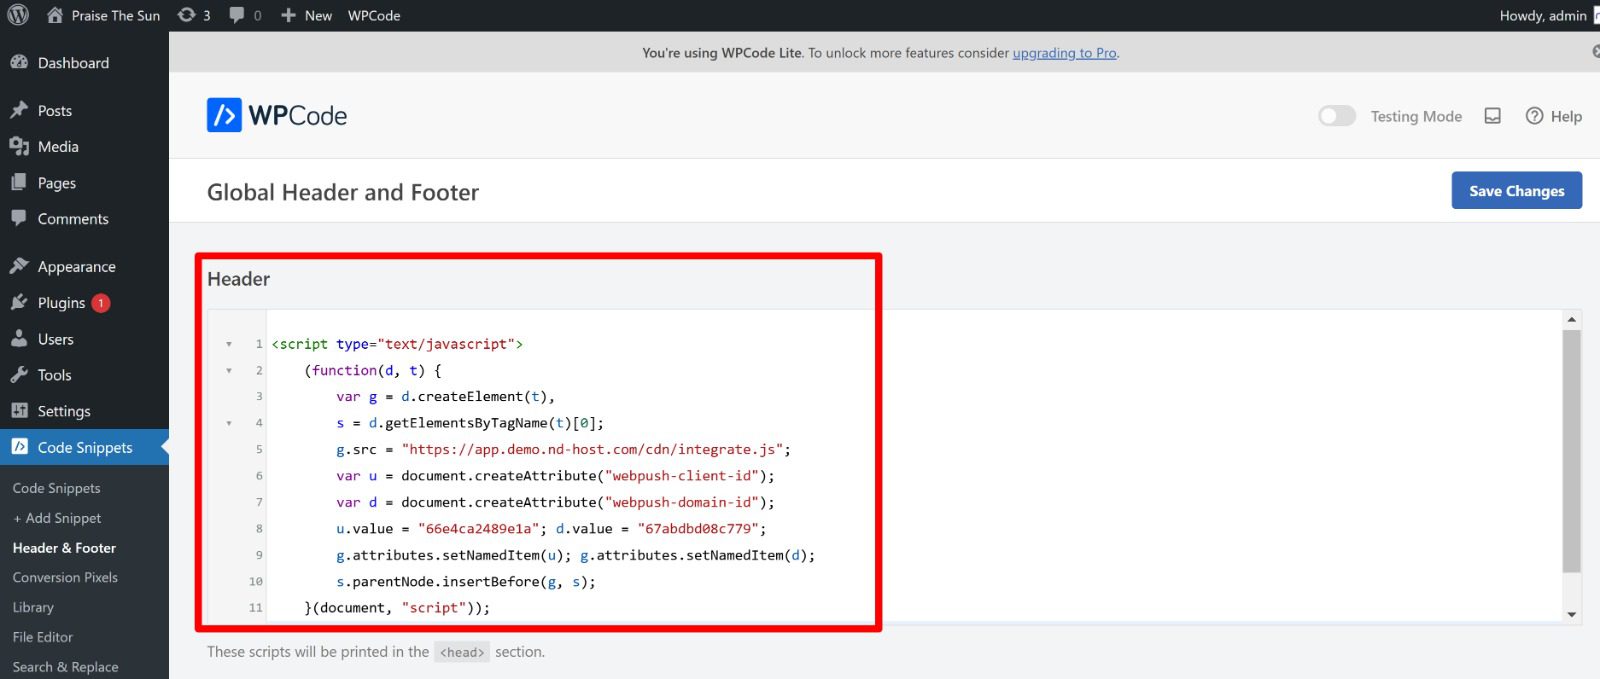
Insert the code provided into your website’s header. You will find it on the Integration tab as well.

If you’re using WordPress, you can also use a plugin to add the code to all pages.
Your website should now appear on the platform, ready to start creating campaigns, and you will see all the push notification tools active for you.
💡 PRO TIP: If you wish use the Social Media tools, simply switch back to the Social Media Management mode by selecting it on the top menu.
Now that your website is connected, you’re ready to start sending push notifications to engage your visitors!